
CourseLeaf CLSS - Frequently Asked Questions
CourseLeaf Section Scheduler (CLSS)
Departments will use CLSS to enter their quarterly schedule.
Key items to make note of when reading through this site:
Phases - periods of time during the scheduling process. Rules will determine what and when items can be changed by the department scheduler. Visit the Resources section of the Academic Scheduling Overview page for visuals on making changes. CLSS gives departments the opportunity to manage their data directly, as opposed to sending emails to the Office of the Registrar. Workflow may be used at various times throughout the process to assist with approval. All rules and warnings are built into the system and will notify or advise the department if scheduling outside of compliance with University guidelines.
Mode - there are two modes associated with CLSS: Design Mode and Refine Mode
- Design mode, all changes to the schedule are held for a scheduling unit and validated at one time by clicking the Validate button. Data only lives in CLSS.
- Refine mode, changes to sections are validated and sent through workflow when each section is saved. Data transfers to PeopleSoft.
1. How do I access CourseLeaf CLSS?
CourseLeaf CLSS is accessible based on security to those who assist with building the quarterly class schedule. Use your Cal Poly username and password to sign in.
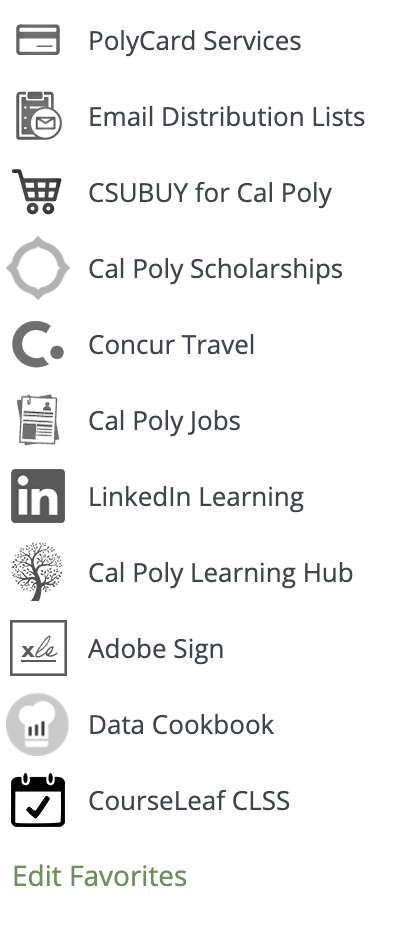
A link to CourseLeaf CLSS can be found on the Cal Poly portal under the My App links for those with security to use the tool.
Select term to view or edit information.

Next, double click on the Scheduling Unit.

2. Is information I see in CLSS real time? Will I receive notification when my changes are complete?
In Design mode, departments are actively making changes to a specific term. Class data lives in CLSS only and has not yet updated PeopleSoft. Once done, the schedule is submitted to the Office of the Registrar and set to Refine mode. In Refine mode, changes move from CLSS to PeopleSoft in real time. In the main console, data for previous terms is accurate with PeopleSoft data.
Note that if workload is associated with a change, this will delay update to PeopleSoft. When workflow is initiated, it is routed to respective approvers. It is only after all approvals are received that PeopleSoft data is updated.
Once you initiate workflow and the edit is accepted, the section will remain locked until the edit is approved or rolled back by workflow approvers. A locked section is an indicator that your change is still under review. If you can edit the section, previous changes have been processed.
Notification will not be sent letting the Scheduler know if an update has been made. Feel free to reach out to classschedule@calpoly.edu if you have questions on where your changes are in workflow. We are also monitoring to insure changes are pushed through as soon as possible. If edits are stalled in the workflow process, we'll work with the respective office to move the change along.
3. How do I add a section?
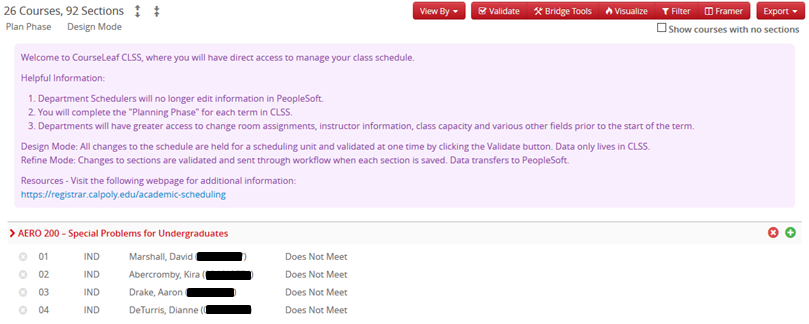
To add a section, select the Plus symbol for that course.
Double click on AERO 200.
Select Plus symbol to the far right. The next section will be added in sequential order.
To add a section of a course that does not exist in the schedule, select "Show courses with no sections." This will show all active courses in the Catalog for that Scheduling Unit.
Double click on the course.
Select the Plus symbol to add a new section.

Helpful Information:
Section #: will auto-populate in sequential order.
Component: defaults to Lecture or enrollment component.
Enrollment: enter Maximum and Rm Cap Request.
Instructor: enter instructor of record or leave as staff.
Schedule: select Does Not Meet to change/add a day/time or leave as is for classes using a TBA meeting pattern.
Notes: add if applicable. Whenever possible, the standard note numbers should be utilized.
Room: select from drop down or use search field to find room.
Schedule Print: Yes or No to publish to class schedule.
4. How do I delete a section? When do I delete versus cancel a section?
Select the X symbol next to the section you would like to delete.

Prior to the schedule going online for student view, if you do not wish to offer a section, you should delete it from the schedule.
After the schedule publication online, sections should be canceled. To cancel a section, change the Class Status to Canceled. This will route workflow to the Office of the Registrar. Note that if students are enrolled, they should be notified of the pending cancellation.

5. Rooms: I cannot access rooms managed by my department in CLSS. What do I do? I see rooms not managed by my department in CLSS. What do I do? How to I request a University Lecture Room? How do I show a room assignment for a virtual classes?
Rooms a department has access to assign in CLSS are based on setup in PeopleSoft. If edits are necessary, please notify classschedule@calpoly.edu.
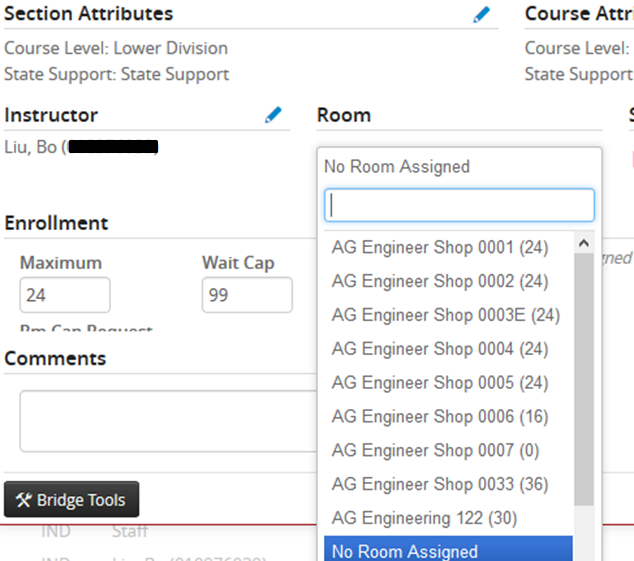
From the Room drop down, the rooms your department manages should be accessible.
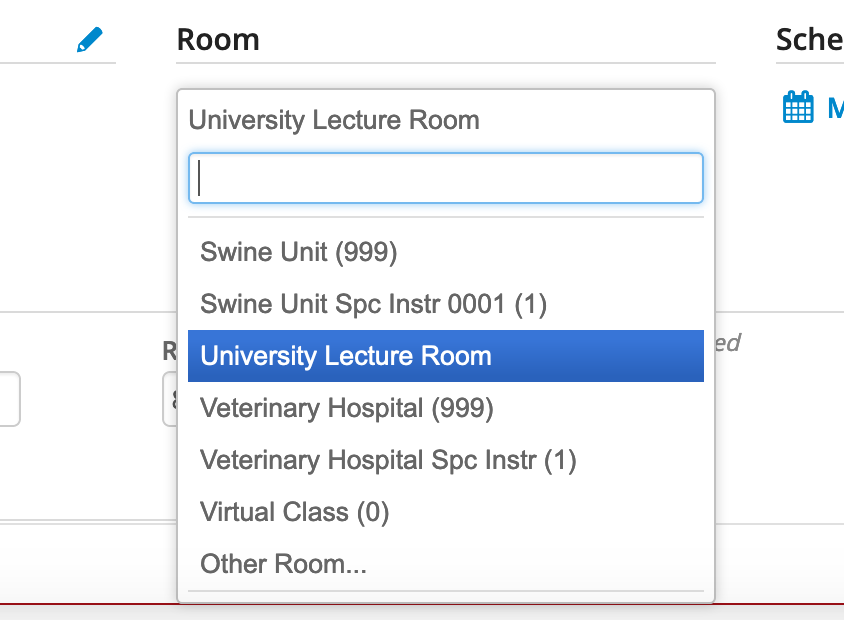
If your class section is requesting use of a University Lecture Room, in the drop down there is a selection for University Lecture Room.
Once University Lecture Room is selected, you will have the option to request specific Room Attributes (Characteristics).
Select the Pencil icon.

Select Add Attribute.

From the drop down list, select the appropriate Room Attribute. If more than one Room Attribute applies, select the Plus icon and add additional values.

Select Accept when done.
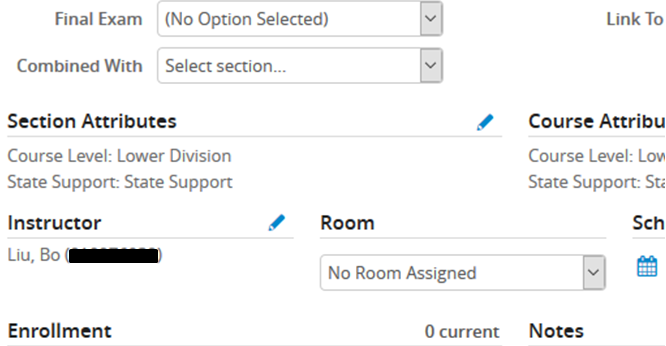
For virtual sections, select one of the following:
Asynchronous classes do not have a set meeting pattern and should not require a room assignment. No Room Assigned should be selected.

Synchronous classes have a set meeting pattern in a virtual format. Select Virtual Class in the drop down.

6. Do I need to modify "Section Attributes"?
Typically, Section Attributes will not need modification. Course Attributes will copy down from the Course Catalog. These are items such as the GE area the course fulfills. An identical Section Attribute is added to each section.
Outside of virtual scheduling, the Section Attribute that may need an update is "Fully Online." (NOTE: While the majority of class scheduling is virtual, this selection has been removed. It will be available when the majority of classes are face-to-face, on campus.)
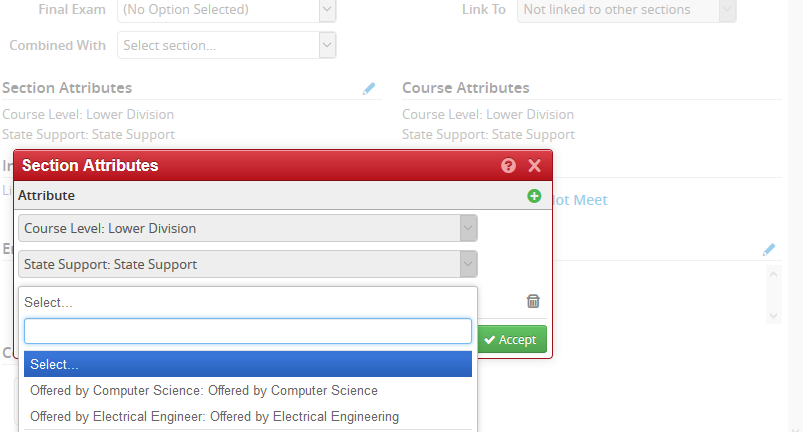
Select the Pencil icon near Section Attributes.
Select the Plus symbol to add a new Section Attribute.

From the drop down, select the Section Attribute that should be added to the class section.
Select Accept.
7. I'm adding or changing a meeting pattern. What do I do if I do not see a standard meeting pattern that is on the approved Office of the Registrar list?
When adding a meeting pattern, it is ideal to use the approved standard patterns as delivered in the Patterns area of the Snapper. These should be available based on component unit. If you find one is not available, contact classschedule@calpoly.edu. If you are requesting consideration of a non-standard meeting patterns, enter information under User Defined in the drop down. Remember to include passing time between classes. This means a class should not be scheduled 3pm-4pm, it should be scheduled 3:10-4pm. You must use the am or pm selection. If you do not use the pm, the Snapper view will schedule the class using the morning (am) pattern.
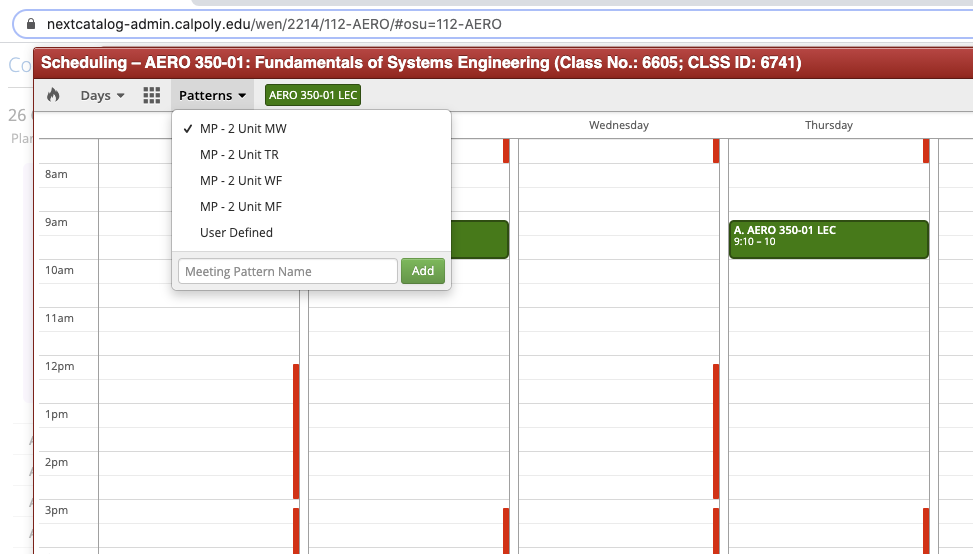
Entry for User Define should be as follows: MW 7:10pm - 9pm which will assign a time block of Monday and Wednesday from 7:10pm start to 9:00pm end.
8. How do I Validate my schedule? How do I submit my schedule/start workflow?
During data entry, you may Validate your schedule to identify any errors or warnings as often as needed. However, you should not start workflow until you are completely done with data entry. Errors will need to be corrected before you are able to start workflow on your schedule.
Select Validate in the top menu.

CLSS will run through all rules and identify any warnings or errors. Errors should be corrected before your schedule is submitted/workflow is started.

Once all errors are corrected and you are familiar with all warnings, you may start workflow on your schedule. This will submit your schedule for final review. If necessary, department head/chair or associate dean will receive CLSS workflow to evaluate your submission. Once they approve, the Office of the Registrar will be notified for final review. Following the Design phase, once workflow is approved, your schedule will be changed to Refine mode. In Refine mode, changes move seamlessly between CLSS and PeopleSoft. Keep in mind if there is a workflow step, information will not update in PeopleSoft until approval is granted.

Quick View of Messages:

9. How do I combine (cross-list) a section?
The word "See" in the main list indicates primary or "parent" section. This is where changes can be made to meeting pattern, enrollment information, etc.
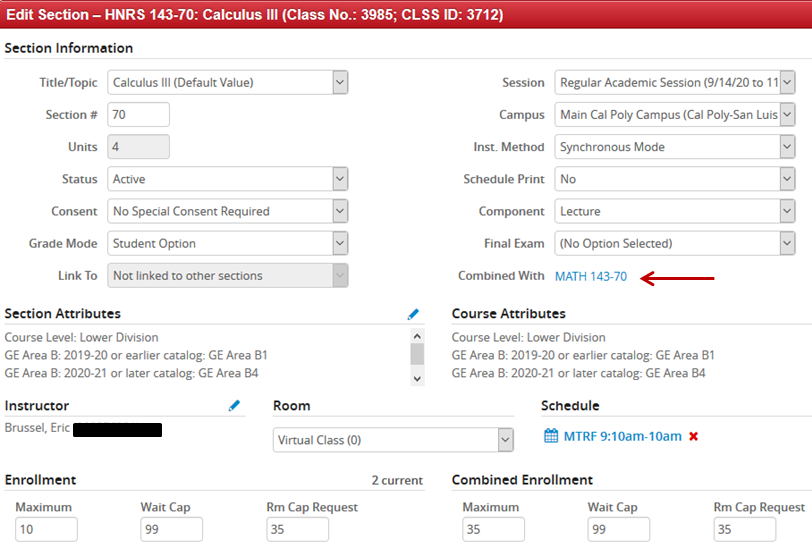
The word "Also" in the main list indicates the section is the "child." A child can remove the relationship with the parent. A parent cannot remove the relationship with the child. From the child section, you can see information about which in the relationship controls the primary scheduling configuration for the Combined section.

In the Combined With field, select the appropriate combination that should be formed for the term. Note that enrollment information and other details will need to be managed once the cross-listing is created.
10. Can I see Reserve Capacity coding in CLSS?
No, you cannot see Reserve Capacity coding in CLSS. Reserve Capacity information is copied from the previous term schedule to the new term schedule. So are class notes. You can see class notes in CLSS. You are able to add/remove notes based on current need. In the Comments box, notify the Office of the Registrar if edits are required to Reserve Capacity information. PeopleSoft is the source to review all Reserve Capacity information.
PolyData Dashboards are updated nightly and may also be used to evaluate Reserve Capacity information.
11. I have a class that does not meet for the full contact hours, and I need to include time "by arrangement" (TBA). What do I do?
In the Comments area, you will enter the number of contact hours that are required in addition to the established meeting pattern.
In PeopleSoft, Meeting APDB Mapping Values, TBA contact hours are added to identify additional contact hours that are used if full contact hours are not scheduled via the meeting pattern.

In CLSS, it is not possible to enter TBA hours in the class entry page. Academic Schedulers should enter any contact hours that need to be added to the section using the Comments box. This will route workflow to the Office of the Registrar so updates are accurately made in PeopleSoft.
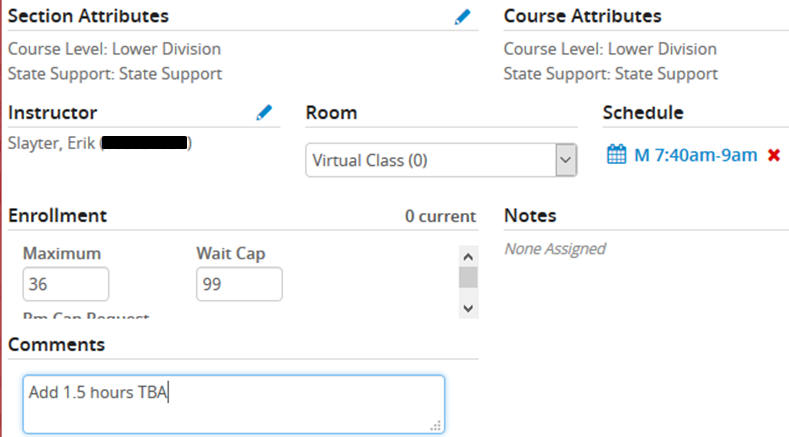
In the above example, the 3 unit lecture is scheduled on Monday only from 7:40am-9am. An additional 1.5 contact hours will be required as TBA. This is conveyed by adding information to the Comments box.
12. Do I still need to submit the Planning Memo when done with data entry?
Quite a bit of information will be entered directly in CLSS. As we transition to CLSS, over the first few terms, please submit the Planning Memo to the Office of the Registrar, University Scheduling when your data entry is complete. Over time, we will add more into the CLSS form to remove the need for the Memo. However, items such as Reserve Cap information is still necessary to provide feedback on so there will be documentation needed when finishing your data entry.
13. Does CLSS have any type of reporting functionality?
Yes. There are a variety of views in CLSS that can be customized based on your search criteria.
Filter View

Enter specific selections to see desired output.
In this example, we are looking for all Animal Science sections assigned to meeting location of Virtual Class. Based on scheduling practice, these are also Synchronous mode class sections.

Select Apply.
Results show all ASCI courses during Spring 2021 with meeting location of Virtual Class.

Framer View
The Framer View allows you to see a snapshot of past or present scheduling.
In this example, during Spring 2021, there is 1 lecture section of ASCI 220 and there are 3 laboratory sections of ASCI 220 scheduled. For a future term where enrollment has not yet started, the totals show total enrollment capacity. For a term where registration is underway or a past term, the totals show total number of students enrolled.

Visualize View

The Visualize View allows for a heat map view of scheduling. Based on your criteria, you are able to see light to dark variations during the week. The lighter portions are those less frequently used. The dark variations are those that have overlap.
In this example, this shows scheduling of the Virtual Class location as assigned to Animal Science sections. The darker areas are those most heavily scheduled throughout the day/week.

The above heat map view can be used with a variety of search criteria. In addition, there is the option to export reports.
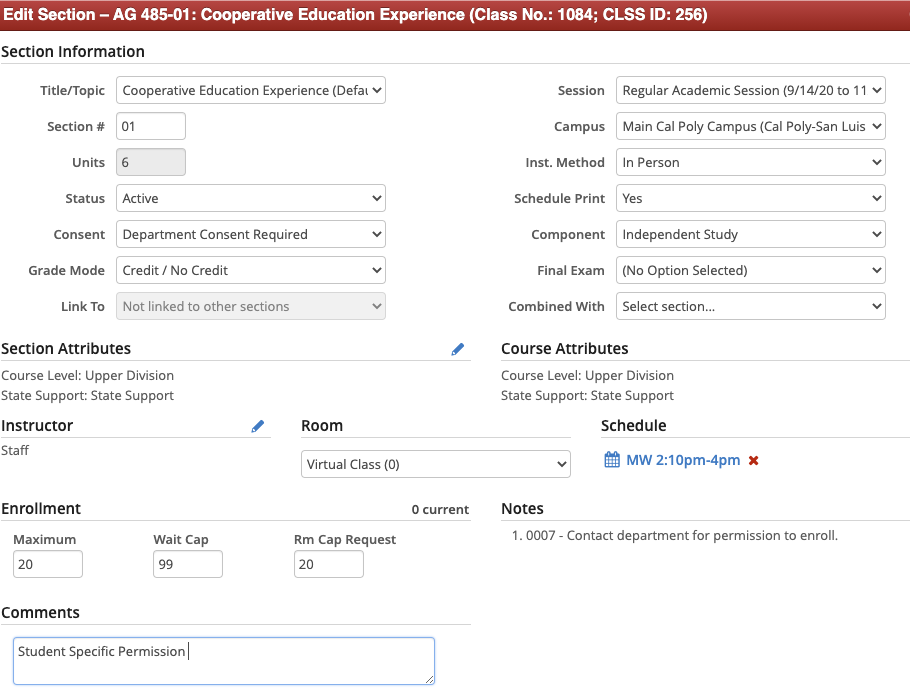
14. I have a class that requires Student Specific Permission. How do I schedule that?
Currently, there is not a selection for Student Specific Permission in CLSS. When scheduling, you will select Department Consent. In the Comments box, you will indicate "Student Specific Permission." This will route workflow to University Scheduling who will then update PeopleSoft.
15. I deleted a section and need to create a new one. I want to use the same section numbers. Can I do that?
In Design Mode, you cannot reuse section numbers. In this situation, you will create the new sections you need. Save and route your schedule when all edits are made (Start Workflow). Once your schedule is changed to Refine Mode by the Office of the Registrar, you will be able to log into CLSS and modify your section numbers so they are in sequential order.
16. When will I see my changes in PeopleSoft?
When changes are visible in PeopleSoft is based on what mode the schedule is in.
Design Mode: Information only lives in CLSS. PeopleSoft is not updated until you "Start Workflow" on your schedule. By starting workflow, you send notification to the Office of the Registrar that your data entry is complete. Information is reviewed by University Scheduling and pushed to PeopleSoft. Changes are visible at that time and your schedule is moved to Refine Mode.
Refine Mode: CLSS "talks" to PeopleSoft. As changes are made in CLSS and workflow is started, changes are pushed either to the workflow approval stage or directly to PeopleSoft. Changes are visible after that push to PeopleSoft.
When data is updated by the Office of the Registrar directly in PeopleSoft, that information is visible in CLSS after a nightly refresh. As an example, after a new topic is assigned to a course at the catalog-level, the system will refresh overnight and the newly created topic will be visible in CLSS. If a new instructor is added in PeopleSoft, data in CLSS will refresh overnight and the department will have access to pull the instructor to a class the following day.
17. When should I validate my schedule? Can I validate several times?
Your schedule may be validated as often as needed. This validation runs a check between the data in your schedule with all of the rules that have been created in CLSS. Results will show "Failed" items which essentially are areas where you've hit a rule. This does not mean there are errors in your schedule but rather alerts you need to be aware of. If you enter scheduling changes over several days, each time you make edits you may validate your schedule so you're aware of any alerts or errors. Errors must be fixed before you may start workflow and submit your schedule for review.
18. Can a component be changed after the section is saved?
No, once the section is saved you can no longer change the component type. You will need to delete that section and create a new one.
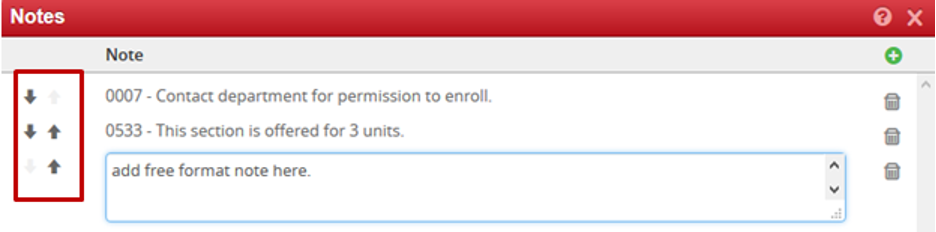
19. I don't see the class note I want to use in the list of options. What should I do?
One time class notes can be added by selecting "Add Your Own Note." If the class note will be used on a frequent basis, reach out to University Scheduling to request a standard note be created.

Use the arrows to change the order the class notes are displayed. Keep in mind that order is how students view notes on Schedule Builder and in Class Search so information should be in a consistent, logical order.
Glossary of Terms
- Child section: a section added to an existing "parent" section becomes the child and inherits the meeting pattern, e-caps, instructor of records; appears as "Also" section on combined sections. i.e. Also HNRS 145-70
- CLSS: CourseLeaf Section Scheduler - Plan, edit, validate and publish class schedule.
- Course Code: the subject code and number that uniquely identifies a course.
- Cross-referenced/Cross-Listed Course: are shared by two or more scheduling units; have identical course elements (number, title, description, units, mode of instruction, prerequisites) except the course prefix which reflects the academic department or program.
- Design Mode: all changes to the schedule are held for a scheduling unit and validated at one time by clicking the Validate button.
- Framer: a view of sections by Instance. Historical data can be viewed in three formats.
- Hard Refresh: Performing a hard refresh completely clears your web browser cache and loads the web page from the server. Windows: CTRL + F5. Apple/MAC: COMMAND + R.
- Heat Map: a visual representation of the number of sections in a scheduled week.
- Instance: the term being scheduled. An Instance can have multiple sessions (i.e. 5W1, 5W2, 8W, and 10W/regular.)
- Modes: How CLSS processes requests.
- Parent Section: changes to pattern, e-caps, and instructor of record; appears as "See" section on combined sections. i.e. See HNRS 145-70.
- Phases: periods of time where changes are based on security (Plan, Proof, Print, Archive)
- Prime Time: distribution of lecture, seminar, and discussion sections throughout the day.
- Refine Mode: changes to sections are validated and sent through workflow when each section is saved.
- Rules: are used by CLSS to determine whether sections or scheduling units meet certain criteria set by the Office of the Registrar.
- Scheduling Unit: group of courses that are scheduled together by the same department.
- Section: a section is the most granular scheduling item; a particular course at a specific meeting pattern.
- SIS: Student Information System (PeopleSoft)
- Snapper: shows the section being scheduled and related sections. The Snapper will attempt to "snap" the section into a pre-defined, standard meeting pattern. Default view is all sections of the same course but other courses of interest can be added for visual of overall scheduling.
- Workflow: a standardized sequence of steps that may follow for approval.