
Newly Admitted Transfer Students
Welcome to Cal Poly! The Office of the Registrar and your College Advising Centers are here to support you in registering for classes.
The following steps have been crafted with you in mind. Please follow the steps below as you acclimate to Cal Poly, prepare to register for the first time, and begin familiarizing yourself with the many student success tools at your disposal.
As you review this page, you may come across terms and phrases that you aren't familiar with. Please visit the Definitions and Keywords page for more information about some of the terminology you will often hear and use while at Cal Poly.
The Assets for Transfer one sheet will also give you an overview of several of the resources you will need to access throughout your Cal Poly career. Please review the Assets for Transfer one sheet to better understand the flow of the registration process and the many tools at your disposal.
Page Navigation:
- Your Transfer Units and Your My Cal Poly Portal Student Center
- Prior to Registration
- During Registration
- After Registration
- Frequently Asked Questions
- Registration Tools Video Tutorial
- Helpful Links
Your Transfer Units and Your My Cal Poly Portal Student Center
After a transfer student is admitted, the Evaluations Unit of the Office of the Registrar evaluates previous college work in relation to Cal Poly requirements. You will receive an email from the Evaluations Unit that your evaluation has been completed. At that time, you will be able to access your finalized Degree Progress Report (DPR) via the Student Center in your My Cal Poly Portal. You can access the Degree Progress Report prior to that time, but your DPR is not final until you receive your email from the Evaluations Unit.
1. Understand How Your Units Transferred to Cal Poly
Course Transfer Equivalence
Transfer students attending California Community Colleges or CSUs may refer to articulation agreements on ASSIST, which equate individual courses to Cal Poly major and support courses. ASSIST also provides CSU General Education lists. For information on using ASSIST to determine Cal Poly credit, please review our “How to Use ASSIST?” page. Some major/support courses may need to be petitioned through the student’s major department if articulation agreements are not in place in ASSIST or if classes were taken at a private institution, a UC, or out-of-state. Evaluations will convert semester units of credit to quarter units.
Note: Transfer students with Advanced Placement credit must have their scores sent to Cal Poly directly from the College Board; notation of AP exams on a college transcript is not sufficient for Cal Poly to award credit. It is recommended that students do this as soon as possible, in order for the transfer evaluation to be as complete and accurate as possible, and in order to satisfy registration prerequisites.
Timing of Transcript Processing
If you sent transfer course transcripts and test scores to Cal Poly by end of day on July 1, you will receive an email from evaluations@calpoly.edu letting you know that your transfer/test scores have been fully processed and your Degree Progress Report (DPR) is available. This report will show you how your classes transferred to Cal Poly and your overall progress toward completing your degree. Your Degree Progress Report is located on the Academics tab on your My Cal Poly Portal under the block titled "General Degree Resources". You can also find your Degree Progress Report in your Student Center in the "Academic Progress" drop-down menu (see "Understand Your Student Center" below). You will receive said email from the Evaluations Unit prior to your fall enrollment appointment.
If you submitted transcripts/test scores AFTER the July 1 deadline, rest assured that the Evaluations Unit of the Office of the Registrar makes every effort to process transcripts/test scores as quickly as possible (an “RP” notation in your Degree Progress Report indicates that your transfer credit is actively being evaluated). However, your credit evaluation may not be finalized before you register for the fall term. If you have questions, you should work with an Academic Advisor in your College Advising Center to review your planned fall schedule in anticipation of the final processing of your transcripts/test scores.
Please do not email Evaluations about the status of your DPR.
Finding Transfer Credit in PolyProfile
In addition to your Degree Progress Report, you will also be able to view your transfer credit in your PolyProfile:
- Access PolyProfile in your My Cal Poly Portal (my.calpoly.edu) and click into Poly Profile tab at the top of the portal landing page.
- Scroll down to the Higher Ed Credits Detail box.
- You will find the transcripts we received from your institution(s). Please let us know there are any missing transcripts.
- Note: New incoming students will not have a Poly Profile until they are matriculated (in July).
After reviewing your courses, you can access your Degree Progress Report to view your overall degree requirements. This will show what requirements you have completed and what requirements you still need to graduate. More information can be found in the "Understand Your Degree Progress Report (DPR)" section below.
2. Get to Know Your Student Center
Your Student Center will help you:
- Access your Degree Progress Report (DPR)
- View registration holds
- View financial aid information
- View dates for registration (in the Enrollment Dates section)
- Verify your student schedule (enrolled classes)
- Access Degree Planner and Schedule Builder
Access Student Center by logging in to your My Cal Poly Portal and clicking on "Student Center" in the "My Apps" section.
If you have a hold on your account, you will not be able to register until it is taken care of. You can view holds by clicking "To Dos, Tasks, and Holds" from the menu on the left.
3. Review Your Degree Progress Report (DPR)
The Degree Progress Report (DPR) is a vital tool that should be reviewed at least once per term to track your progress to degree. Ideally, you should run your DPR prior to and immediately after registration each term. The Evaluations Unit uses the Degree Progress Report to post your degree, so it is important to make sure the courses you enroll in are fulfilling the degree requirements you expect.
Explore the Degree Progress Report Guide to learn how to read your DPR
Prior to Registration
4. Gather Your Curriculum Sheet and Your Flowchart
This tool displays all of your degree course requirements in a one-page snapshot. It should always be used in conjunction with your Degree Progress Report (DPR).
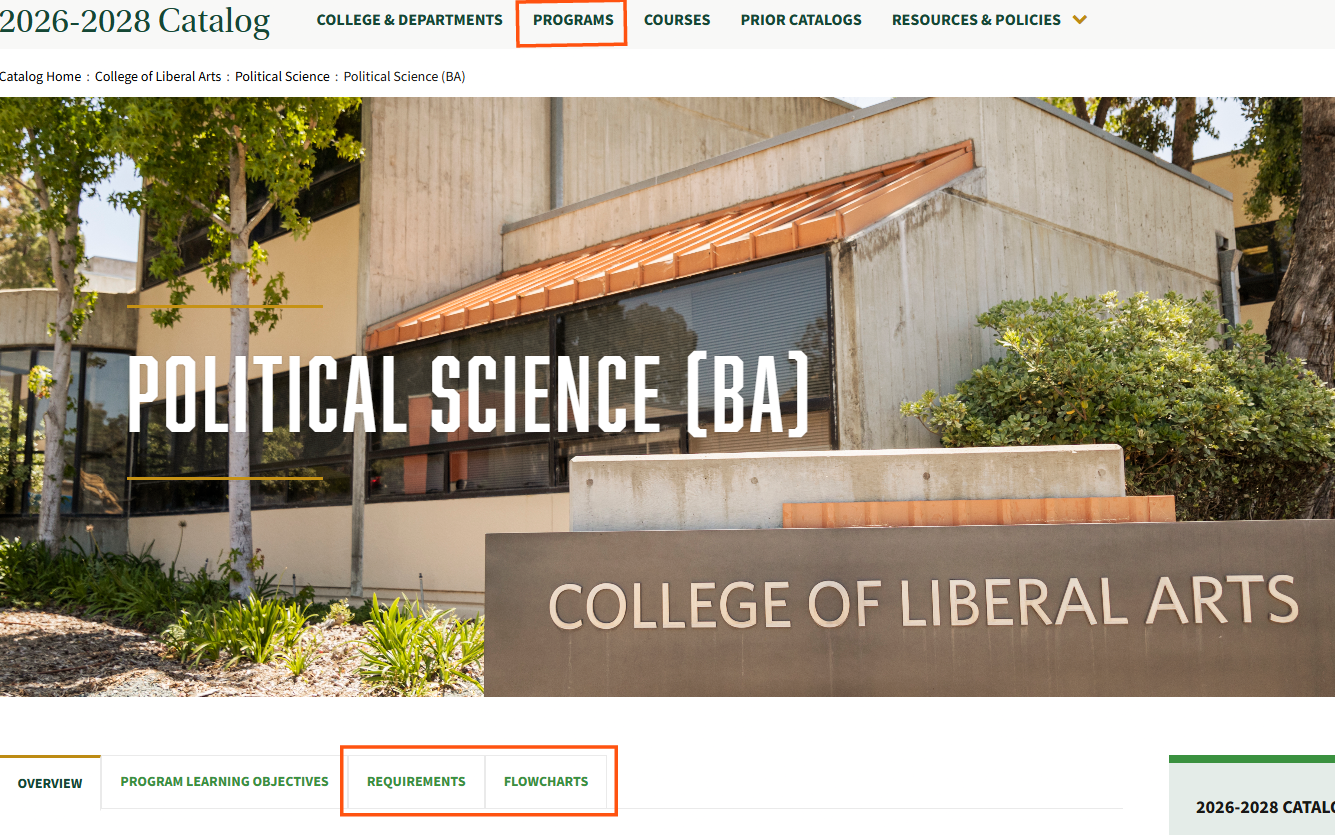
Requirements & flowcharts can be found in the catalog. Select your program at the top header then click on requirements or flowcharts.
Flowcharts
Flowcharts display one example of a path towards graduation in 4 years. All transfer students enter Cal Poly at different places in their curriculum. The 4-year flowchart can help transfer students clarify what is typically completed in the first two years and prioritize any of those unmet courses in their first year at Cal Poly.
Catalogs prior to 2026 go to catalog.calpoly.edu > Degree Flowcharts and Curriculum Sheets
- How to find a copy of your flowchart:
- Bailey College of Science and Mathematics (BCSM)
- College of Architecture and Environmental Design (CAED) - under Major Specific Resources
- College of Agriculture, Food and Environmental Sciences (CAFES)
- College of Engineering (CENG) - under Major Specific Documents
- College of Liberal Arts (CLA) - under Major Specific Materials
- Orfalea College of Business (OCOB)
You will learn which Cal Poly Catalog you are on once you get an email that your transfer evaluation has been completed. You can also find your Cal Poly Catalog listed in large green font at the top of your "Academics" tab in your My Cal Poly Portal.
5. Review Your Major’s Fall Course Recommendations
Your major has provided a list of courses they recommend for your fall registration. Seats have been saved for incoming transfers and will open on registration day.
First, find your college:
- Bailey College of Science and Mathematics (BCSM)
- College of Architecture and Environmental Design (CAED) - under Major Specific Resources
- College of Agriculture, Food and Environmental Sciences (CAFES)
- College of Engineering (CENG) - under Major Specific Documents
- College of Liberal Arts (CLA) - under Major Specific Materials
- Orfalea College of Business (OCOB)
Once you have accessed your major’s list of course recommendations, go to Schedule Builder and get familiar with how to search for classes and build possible schedules (see "Start to Build a Schedule (or Several) in Schedule Builder" below). Don’t forget to check for prerequisites within the course descriptions.
6. Understand the Registration Tools
Begin with the overview of the Cal Poly registration process.
For additional examples, brief video tutorials, and detailed instructions, please visit the "Tasks" section of the Student Center page.
7. Start to Build a Schedule (or Several) in Schedule Builder
Schedule Builder is the online scheduling tool that allows students to plan their schedules and enroll for the upcoming term. Schedule Builder displays all courses available for the upcoming term, course descriptions, and prerequisites. It allows you to input your availability, create multiple possible schedules, and save favorite schedules.
When searching for available courses in Schedule Builder, all students need to pay attention to PREREQUISITES and SECTION NOTES.
Important Note: Schedule Builder has the ability to pull in class options from Degree Planner. You are NOT already registered for these classes. You will register yourself in classes that may or may not be the same as the classes reflected in your Degree Planner. You are encouraged to follow your major's list of course recommendations during the fall term, NOT the courses Degree Planner recommends.
Schedule Builder usage tips:
- Make note of Campus when searching for classes. Cal Poly offers courses at four campus locations: Cal Poly, San Luis Obispo Main Campus, Cal Poly Solano Campus, Allan Hancock, and Cuesta College. Class section numbers and campus are key indicators on where a course will be offered.
- Filters don't actually filter until you try to build a schedule.
- Class Status filter: To view all class offerings--including classes that are closed, full, or have formed a waitlist, you should uncheck both Class Status filter options (uncheck both "Open" and "Wait List"). Removing the Class Status filter entirely will ensure that your search results include all classes regardless of class status.
- You have the ability to select multiple Section Filters, but Section Filters do not overlap. If you select the GWR filter and the USCP filter, Schedule Builder will include all GWR courses AND all USCP courses in the search results, not just courses that fulfill both requirements.
- Create and save multiple schedule options for the term. If courses fill up, you want to have back-up options ready.
Review Schedule Builder steps and screenshots to plan and enroll in classes.
During Registration
Though the overall registration process is the same across colleges, each college processes course substitutions differently. Your college advising center has created specific transfer registration steps to help you navigate this process. Please click on your college's name to learn more:
The information outlined below will also help guide you during registration.
8. Know Your Enrollment Appointment
You can find your enrollment appointment(s) in your Student Center. In the "Enrollment" drop-down menu, select "Enrollment Dates."
Enrollment appointment important terminology:
- 1st Round: Students can register anytime between their first round enrollment appointment and the end of first round registration. During first round registration, students can enroll in up to 15 units.
- Open Enrollment: Allows students to continue making changes to their schedule. Unit max increases to 20 units during open enrollment and enrollment appointments are no longer needed.
- Waitlist: Students can waitlist for a maximum of 16 units per term. Waitlist units are not included in enrollment unit limits (for example, during first round registration, students can enroll in up to 15 units and waitlist in up to 16 units).
For all future registration terms, the date and time of your enrollment appointment will be based on your actual academic progress level (how many degree applicable units you have completed). Students who have completed a larger percentage of their degree requirements receive an earlier enrollment appointment.
You can see your academic progress reflected in your Academic Progress Gauge in your PolyProfile.
Current and future enrollment schedules can be found on the Enrollment Appointments page.
9. Use Your Degree Planner and Your Schedule Builder
Step 1: Degree Planner
Please note: You are encouraged to follow your major's list of course recommendations during the fall term, NOT the courses Degree Planner recommends. Once you log in regularly and begin to use Degree Planner to plan future terms, you will see a higher level of accuracy in interaction between Degree Planner and Schedule Builder. We recommend planning 2-3 terms in advance.
Degree Planner is a degree planning tool which provides you with a personalized, pre-populated path to graduation. Your path contains a sequence of courses that you are encouraged to regularly adjust. For detailed instructions on using Degree Planner, visit Degree Planner General Information.
Data from Degree Planner is used by each academic department to estimate which classes are in most demand for the upcoming year. Keeping your Degree Planner accurate and up-to-date helps all departments plan for future course demand.
Locate Degree Planner within your Student Center in your My Cal Poly Portal. Again, your Student Center will appear on the left-hand side of your portal under your "My Apps."
Please note: Degree Planner is a planning tool that automatically updates and adjusts as you enroll in courses. It does NOT enroll you in the classes you choose, nor does it guarantee you a seat. For assistance with the registration process, proceed to Step 2: Schedule Builder.
Step 2: Schedule Builder
Schedule Builder works with Degree Planner to create a seamless user experience for planning and registration. Planned coursework from your Degree Planner may be imported into Schedule Builder, or you may search for classes and add them one at a time to create multiple schedule options. For detailed instructions on using Schedule Builder, visit Schedule Builder General Information.
As already explained, Schedule Builder allows you to build multiple schedules, save your favorites, and enroll in classes directly in the platform. Like Degree Planner, it resides within the Student Center. Locate Schedule Builder within your Student Center in your My Cal Poly Portal. Your Student Center will appear on the left-hand side of your portal under your "My Apps."
Although we hope that registration runs smoothly without any glitches, there is always the possibility that technological issues arise.
During new transfer student registration in August, it is possible that Cal Poly's system may become overloaded. Overload would cause the system to lag. If this happens, please know you are not alone, and this is most likely occurring across the system. Here are some tips, should this occur:
- Do not continuously refresh your screen after you have selected enroll. Every time you click refresh, you may be placing yourself further down the wait list.
- Only refresh your screen if the loading icon disappears or continuously runs after a full minute.
- If you are having issues registering through Schedule Builder, you may want to try registering instead through your Student Center by selecting Enroll and Add. To complete registration via the Student Center, you will need the 4-digit class number assigned to each class. These class numbers can be found via Schedule Builder or Class Search.
There are several tools that you can use to complete your registration. We recommend using Schedule Builder, but additional information, examples, and tutorials can be found on the Office of the Registrar's website:
10. Understand the Add/Drop Period, Withdrawal Policy, and Late Enrollment Period
Add/Drop Period
The “add/drop period” occurs at the start of the term and is when students can continue to add and/or drop classes from their schedule. Students may elect to drop a class through the tenth day of the term. Students may elect to add a course through the fifteenth day of the term. After the add/drop period, adding and dropping classes is not allowed. However, students can withdraw from a class(es) or appeal to enroll in a class(es) under specific circumstances (see below).
Withdrawal Policy
Between the end of the regular add/drop period and the last day of instruction, a student must petition to withdraw from a course for "serious and compelling" reasons or "reasons beyond the student's control." For details on this process, as well as to learn how to withdraw from an entire term, see Drops, Withdraws, and Leaves.
Late Enrollment Period
The late enrollment period begins the day after the add/drop period ends and lasts a total of five business days. During this period, a student can submit a Late Enrollment Appeal. The late enrollment period begin and end dates can be found in the Student Planning Calendar for the term. If a Late Enrollment Appeal is submitted to the Office of the Registrar after the deadline for the term, it will not be processed.
11. Understand the Waitlist Process
It is important to emphasize that registration for new transfer students is very unusual. The process is unique because new transfer students register several months after continuing Cal Poly students have already registered for the fall term. Although departments do their best to reserve seats for transfer students, sometimes classes still fill up, and waitlists are formed.
The two reasons you may end up on a waitlist are:
- There are no more open seats available in the course
- Another transfer student tried to enroll in the course, but since they have enrolled past the maximum unit load for round 1 registration or did not meet the course pre-requisites, the wait list system has been "turned on," and every student after them has been placed on the waitlist
If you find yourself on a waitlist:
- Review the Waitlist a Class demo and the Waitlist Rules.
- Remember the additional schedules you saved in Schedule Builder. Use those options to continue to register or waitlist in any classes that you need. Remember you can waitlist for up to 16 units per term.
- Check out other sections of the course you are waitlisted for. A different section may have available seats. Take a look at other sections and register for or waitlist those as well.
- Review your major's suggested course list (see the hyperlinks in "Review Your Major's Fall Course Recommendations" above). Some courses require a permission number to enroll. If a permission number is needed, you should see this indicated on your major's fall suggested course list.
After Registration
12. Review Your Degree Progress Report (DPR) Again
Ideally, you should run your DPR prior to and immediately after registration each term. Once you have registered for courses, you want to ensure that the classes you are enrolled in will fulfill the degree requirements you expect. Familiarizing yourself with your DPR will help keep you on track during your time at Cal Poly.
13. Review and Save Cal Poly Calendars
There are multiple term-specific calendars that are good to be aware of.
Please bookmark or save the following for easy reference moving forward. These can all be found on the Office of the Registrar website:
- Planning Calendar (term-specific)
- Registration Schedule (term-specific)
- Final Exams Schedule (term-specific)
14. Explore College-Specific Transfer Resources and Support
15. Learn About Other Cal Poly Policies
Academic policies at Cal Poly will likely differ from other campuses you have attended. Please take the time to review the policies outlined below:
Frequently Asked Questions
The following frequently asked questions have been created to assist you as you register for your first term at Cal Poly:
When can I meet with an advisor?
The afternoon program of SLO Days Part 2 is dedicated to time with your college advising center.
Until you receive an email from evaluations@calpoly.edu (in early August up until you attend SLO Days Part 2) when your Degree Progress Report (DPR) and Degree Planner are available, your advisor is not be able to meet with you. An accurate DPR is necessary in order to properly advise you. We know this can be hard to wait for, but there will be time to help get your questions answered before you register.
What should I take, and how many units should I enroll in for my first term at Cal Poly?
Your major has provided a list of courses they recommend for your fall registration. Seats have been saved for incoming transfers and will open up on registration day.
Your fall suggested course list will also include a recommendation of how many units you should register for in fall.
To be a full-time student at Cal Poly, you must be enrolled in 12 or more units.
- Bailey College of Science and Mathematics (BCSM)
- College of Architecture and Environmental Design (CAED) - under Major Specific Resources
- College of Agriculture, Food and Environmental Sciences (CAFES)
- College of Engineering (CENG) - under Major Specific Documents
- College of Liberal Arts (CLA) - under Major Specific Materials
- Orfalea College of Business (OCOB)
If I have transfer credit that did not count for a Cal Poly course, what can I do?
You may petition for it to count toward your degree.
Please note: Advisors are also submitting petitions on your behalf if they noticed that your credit did not fully articulate. You may receive a notice that a form was completed for you.
What are the different ways that classes are being offered at Cal Poly?
There are six different modalities of instruction being offered at Cal Poly:
- Synchronous
- Asynchronous
- Sync/Async Hybrid
- In Person
- In Person/Sync Hybrid
- In Person/Async Hybrid
For definitions of modalities and instructions on how to search for classes by modality of instruction in Schedule Builder, please visit the Schedule Builder page.
Students may elect to take virtual courses across campuses if seats are available.
I have questions about how to use Schedule Builder. Is there anyone I can speak with?
Schedule Builder will be reviewed in detail during SLO Days Part 2 in August. The Office of the Registrar will present a general introduction to the tool and allow ample time to answer questions. Please review all the frequently asked questions and video tutorials outlined on the Schedule Builder webpage to begin familiarizing yourself with the platform.
My Degree Planner displays courses that are not the courses recommended by my Advisor or my Department. What should I do?
Because coursework is still being posted for fall term, you may see discrepancies between PLANNED courses and what you intend to take. Please note: You are encouraged to follow your major's list of course recommendations during the fall term, not the courses Degree Planner recommends. Once you log in regularly and begin to use Degree Planner to plan future terms, you will see a higher level of accuracy in interaction between Degree Planner and Schedule Builder.
Registration Tools Video Tutorial
Helpful Links
Please use the following links as additional resources during your transition to Cal Poly: